7.30.2011

Summer Salad with Heirloom Tomatoes and Arugula

Something about having an entire heirloom tomato to one's self feels incredibly indulgent, and wonderful!

Heirloom tomatoes, by definition, are open-pollinated cultivars (a plant selected for desirable characteristics that can be maintained by propagation - unlike varieties of GMO produce that have been bred to lack seeds). A true heirloom is a cultivar that has been nurtured, selected, and handed down by family members for many generations.

Typically, I've been enjoying salads with baby arugula as the base, but on this occasion, shortly after returning from my local Farmer's market, I decided to have some fun with this "Cherokee purple" tomato:

First, I sliced it into big, beautiful wedges.

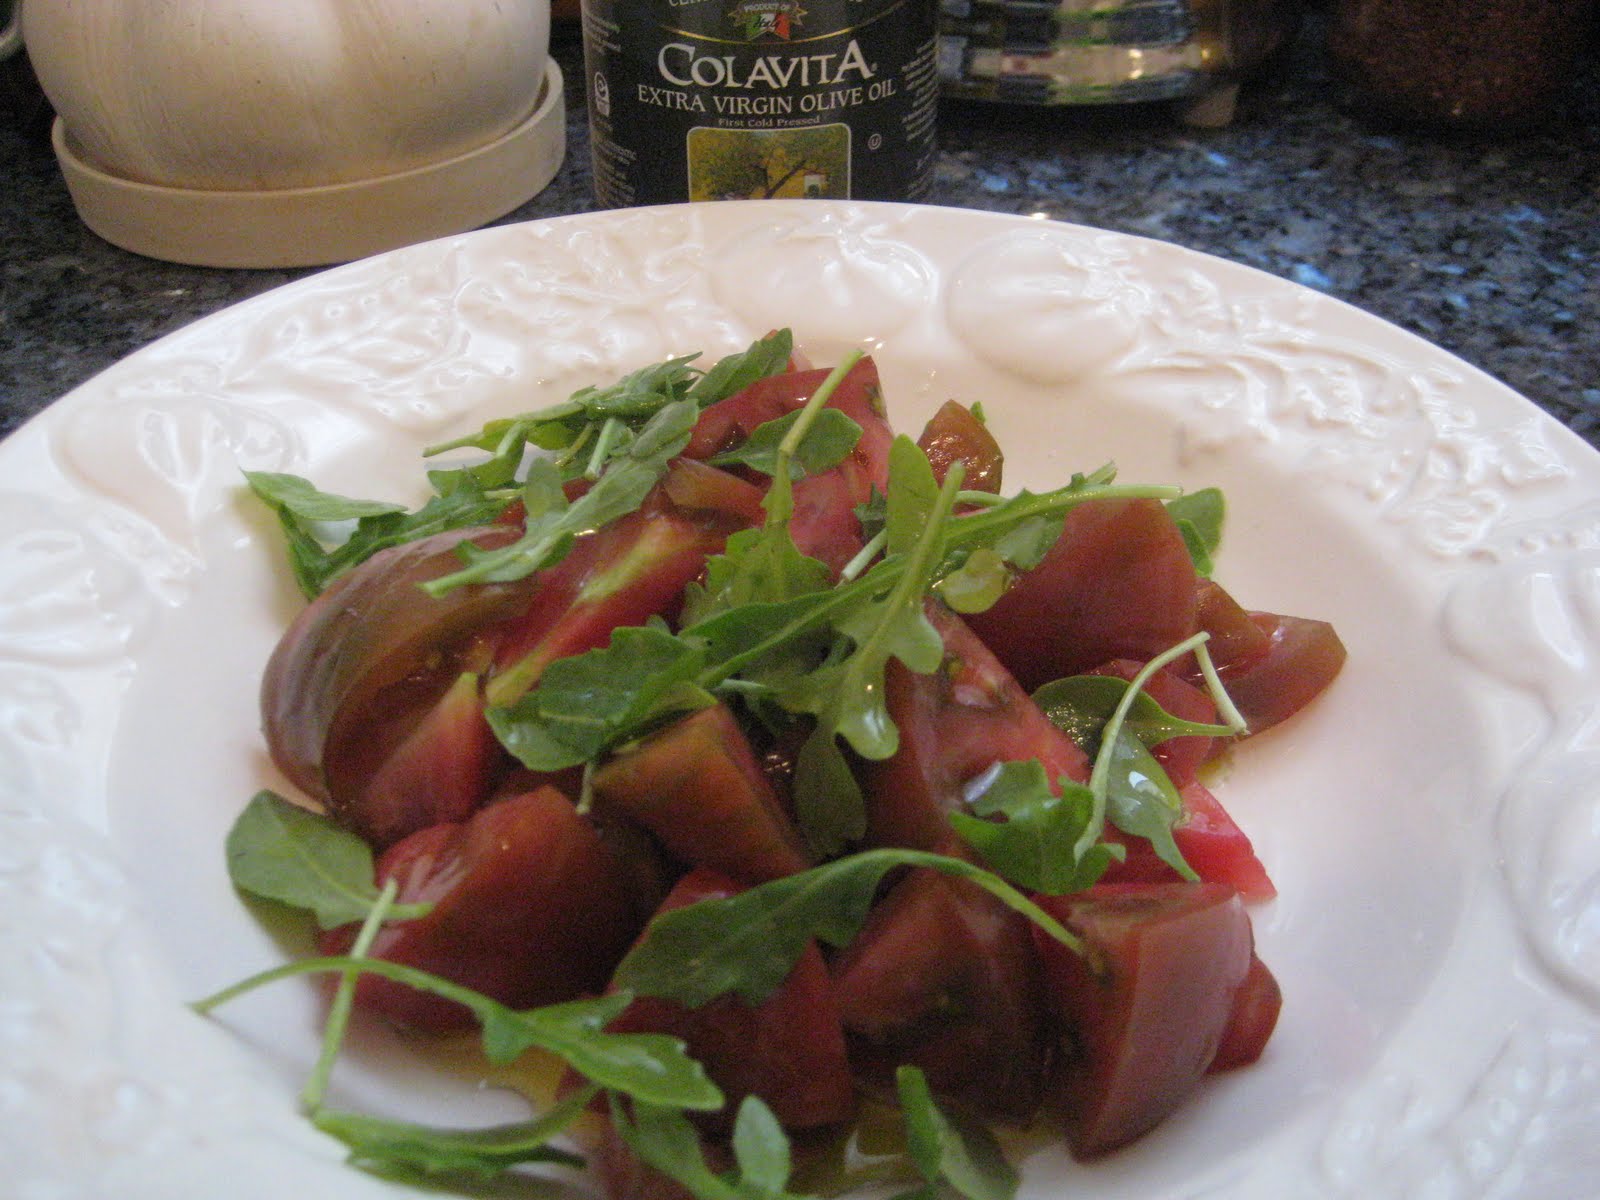
Then, just a sprinkle of organic baby arugula to add texture and a mild peppery flavor, plus a generous drizzle of olive oil.

Next, lemon zest to give it some extra zip!

And, finally, some fresh walnut halves to add texture, crunch and heart-healthy fat; and some freshly ground salt & pepper to taste.

Oh, my, goodness. Num num num num num.

6.26.2011

Fettucini with Asparagus and Fresh Goat Cheese


To make the fresh egg pasta all you need is 2 cups of all-purpose flour and 3 large eggs, beaten. Pulse the flour with a metal blade in a food processor to distribute and aerate; then add the eggs and process until the dough forms into a ball, about 30 seconds. Turn the dough ball out onto a dry work surface and knead until smooth (1-2 minutes). Cover with plastic wrap and let rest for at least 15 minutes up to 2 hours. Then use a pasta machine to roll out the dough and cut (per your pasta machine instructions).

Voila!
To prepare for the sauce, steam 1 pound of 1-inch asparagus pieces until just tender (about 2 min). Set aside. Then place 3 ounces of fresh goat cheese (crumbled), 1/4 cup heavy cream, and 1 clove of minced garlic into a small bowl and combine. Chop about 2 Tbsp of fresh mint leaves. Meanwhile, bring about 4 quarts of water to a boil with a Tbsp of salt and cook your pasta until al dente. Reserve 1/2 cup of the cooking water; drain the pasta and transfer it back to the pot. Stir in the asparagus, goat cheese mixture, and mint; and use the reserved cooking water to moisten as necessary. Season with salt and pepper to taste and serve immediately. Enjoy!

5.29.2011

Eggs Benedict

The title of this post should really be "How to Make a Hollandaise Sauce Without Mucking It Up".

A month or two ago I decided to whip up some Eggs Benedict for my family for Saturday brunch. It had been awhile since I'd made the dish, and my husband came into the kitchen as I was starting. He asked me, "When's the last time your Hollandaise failed?" I paused and thought about it... "You know, I really don't know, it's been such a long time." Little by little the rest of the family came in, made some number of distractions, and lo and behold, the sauce broke for the first time in as long as I could remember! I was so sad! We ate it anyway, and my younger daughter told me, "This is the best lunch you've ever made!" I felt happier for a minute, until she added, "That's because you never make lunch." OK, admittedly I'm pretty lazy on the weekends when it comes to our midday meal and they eat their weekday lunches at school, so I concede... *sigh* My Hollandaise failure pretty much made me a cranky grump for the rest of the day. I've begun to take myself too seriously!

There are a couple of major ways one can fail at making a Hollandaise sauce. The one that led to my sauce's demise is temperature. It is extremely important that your sauce is not allowed to overheat, EVER! This is important while making the sabayon of egg yolk and water, but much more important while making your emulsion. This is crucial: before adding the butter to the sauce, REMOVE IT FROM THE HEAT!

The second important thing to keep in mind is that the melted butter needs to be added in a small, steady stream, and you cannot stop whisking! Keep that whisk moving, and don't add too much butter at once.

So here we go...

First step:

Clarify enough butter to make 200mL, somewhere between 1.5-2 sticks. Do this by melting it over medium heat in a small saucepan until it bubbles and the solids begin to coagulate on the sides. Strain through a fine mesh strainer into a glass measuring cup. Set aside until needed, keeping warm but not hot.

In a double boiler (water in the bottom pan) over medium heat, whisk together 2 egg yolks with 1 fluid ounce of water (= 30 mL for Europeans, 1 shot glass for the rest of us.) Whisk constantly until the heat begins to cook the mixture ever so slightly. It should look like thick, frothy pudding, not like scrambled eggs. This is called a sabayon.


Make your emulsification by whisking the 200 mL of melted clarified butter into your sabayon (OFF the stovetop, please!), pouring the butter in a very small, steady stream. Whisk constantly, making sure that the butter is incorporating well into the sabayon to make a smooth, homogenous mixture.


Season your sauce with a pinch of cayenne pepper and about 2 teaspoons of lemon juice, or to taste.

Serve over poached eggs, Canadian bacon, and an English muffin to make a standard Eggs Benedict, or do what I do and serve it atop eggs gently cooked over easy, Canadian bacon, and some toasted rustic sliced bread.


Here's to never breaking your sauce!

4.01.2011

Apple Butterscotch Oatmeal Cookies

Today I thought that I invented a recipe, which I called Apple Butterscotch Oatmeal Cookies. Apparently this is not a new concept. A Google search yields plenty of recipes. At any rate, they are tasty and chewy and a nice change of pace.


Here is how I did it:

Cream together:
2 sticks butter at room temperature
1/2 cup brown sugar
2 eggs
1 tsp vanilla

Beat in:
1 1/4 cup flour
1 tsp baking soda
1/2 tsp salt
1/2 tsp cinnamon

Stir in:
6 packets apple cinnamon flavor instant oatmeal (approx. 3 cups)
1 package (11 oz) butterscotch chips


Drop by the spoonful onto baking sheets, and bake at 375 degrees F for 8-10 minutes; yields 3-4 dozen.

ENJOY!

3.01.2011

Tomato Goat Cheese Tart


  • Preheat oven to 400 degrees Fahrenheit
  • Line a tart pan with pre-made filo, brush with melted butter
  • Thinly slice about 4 plum tomatoes, and top the filo crust concentrically with the slices
  • Beat together 3/4 cup cream, 3/4 cup milk, 3 eggs, 4 ounces goat cheese, salt, pepper, nutmeg and chopped parsley
  • Pour the mixture over the tomatoes
  • Bake the tart for about 45 minutes

ENJOY!

2.15.2011

Veal with Fontina Cream Sauce

For our Valentine's Day dinner last night, I decided to keep things simple but flavorful. I was pressed for time because of many late afternoon errands, but knew I wanted to do something special. I browsed through a cookbook I own and have not yet cooked from, but which looks really good: Il Viaggio di Vetri. With limited time on my hands I was too overwhelmed to follow a new recipe step by step, since it is less time-consuming for me to just throw something together. I found a really yummy-sounding recipe, took the basic idea of the ingredients list, and put my own personal twist on it. This is what I came up with:


And here is what I did to make it...

First disclaimer, I measured nothing...

First, put a handful of dried porcini mushrooms to soak in hot water.

Next, pour some cream into a saucepan over low heat, add some thin slices of fontina cheese, and add some fresh rosemary. I cleared an entire sprig. Season with ground sea salt freshly ground white pepper. Let the sauce simmer at a very low heat all the while that you are preparing the rest of the ingredients so that the rosemary flavor will become deeply infused.

After at least 20 minutes of soaking, finely chop the porcini mushrooms, then saute them in butter. Season with salt and freshly ground black pepper.

Next, coat thick cubes of veal cutlet in flour seasoned with salt and pepper. Heat some vegetable oil over medium heat in a skillet, and cook the veal for about 5 minutes on each side more or less depending on thickness.

Meanwhile wash and trim some broccolini, and barely saute it in some olive oil. Season with salt and pepper.

Spoon a layer of sauce onto each serving plate. Top with a serving of veal. Sprinkle with porcini mushrooms, then drizzle some more sauce over the top. Garnish with freshly chopped Italian parsley. Add some broccolini on the side.

Enjoy!

2.13.2011

Chocolate Chip Cookies (Vegan, but DON'T let that deter you!)

I was first introduced to this dessert last summer during a wine country picnic. One of my girlfriends at work follows a vegan diet, and she brought these cookies to share with the group. I have had my share of bad vegan cookies, so was pleasantly surprise and amazed when I experienced the well-rounded flavor and the terrific texture. I actually think they are better than most traditional chocolate chip cookie recipes.

Since tomorrow is Valentine's day, and Bill is STILL in Texas, I decided to make these cookies for myself. I MAY share and take them to work.

I would recommend doubling or tripling the recipe, yields about 3 dozen cookies. Note that the cookies spread a lot and come out big and fluffy.


Ingredients:
1 cup unbleached all-purpose flour
1 teaspoon baking powder
1⁄2 teaspoon baking soda
1⁄4 cup unrefined sugar
1⁄4 teaspoon sea salt
1⁄3 cup pure maple syrup
1⁄4 teaspoon blackstrap molasses
1 – 1 1⁄2 teaspoons pure vanilla extract
1⁄4 cup canola oil (a little generous)
1⁄3 cup non-dairy chocolate chips


Preheat oven to 350°F (176°C). In a bowl, sift in the flour, baking powder, and baking soda. Add the sugar and salt, and stir until well combined. In a separate bowl, combine the maple syrup with the molasses and vanilla, then stir in the oil until well combined. Add the wet mixture to the dry, along with the chocolate chips, and stir through until just well combined (do not over-mix). Place large spoonfuls of the batter on a baking sheet lined with parchment paper and flatten a little. Bake for 11 minutes, until just golden (if you bake for much longer, they will dry out). Let cool on the sheet for no more than 1 minute (again, to prevent drying), then transfer to a cooling rack.
I just ate a warm one straight out of the oven with a tall glass of cold soy milk :) I hope you enjoy this interesting and yummy recipe as much as I do!

2.12.2011

Rhubarb-Strawberry Tart

It has been a long winter here in the New York Metropolitan Area. After weeks and weeks of the snow piling up, one snowstorm after the other, we are finally getting some days of warmer (above freezing) weather, and the snow is beginning to melt. This week, for the first time all month, I can see some of the grass in the front yard! This can only mean one thing: Spring is coming!

I am celebrating the first signs of the warm weather to come, as well as the upcoming Valentine's Day holiday, with this succulent red tart, brimming with rhubarb and strawberries.


Ingredients:

Tart shell

200 grams flour
1 teaspoon sugar
1/4 teaspoon salt
8 tablespoons butter
4 tablespoons ice-cold water
1/2 teaspoon almond extract
(+ 2 teaspoons melted butter and 1 teaspoon sugar to brush and sprinkle over prepared crust)

Filling

3/4 pound rhubarb
3/4 pound strawberries
1/2 cup sugar
2 tablespoons flour

Glaze

2 tablespoons strawberry preserves
1 teaspoon water
1/4 cup sugar


Instructions:

  • Preheat oven to 400 degrees F.
  • Make your tart crust by combining the flour, sugar and salt, and cutting in the butter, making sure to leave the mixture a little coarse so that the pea-sized chunks of butter can melt during baking, resulting in a flakier crust. Moisten the mixture with the water and almond extract, and gently mix together until the liquid is uniformly incorporated. Pat the dough into a ball, flatten into a disc, cover with plastic wrap and refrigerate for 30 minutes.
  • Next wash the strawberries and rhubarb, and trim the ends and leaves. Slice into thin pieces. Mix with the sugar and flour in a large bowl.
  • Roll out the dough, place in a tart dish, and fill it with the rhubarb-strawberry mixture. Brush the exposed crust with melted butter, and sprinkle with sugar.


  • Bake at 400 degrees for 45 minutes.
  • Prepare the glaze by melting the sugar, preserves and water in a small saucepan.
  • Remove from the oven, brush the top with the glaze to ensure an evenly shiny finish, and let cool.


Happy Valentines Day!

Fresh Berry Cobbler

Since Valentines Day is this Monday my school friends and I were trying to think of interesting desserts that could be made for the occasion. Not for our relationships in particular, but just in general. Audrey came up with the idea to make a Fresh Berry Cobbler, which comes out amazing. We decided to make it tonight. I apologize for the dorm room photos again, the lighting was very yellow.

I realize that berries aren't in season during the winter. I haven't tried the following fruits, but it's foreseeable that some of these may be good alternatives especially if you only want to use in-season fruits: Pears,  Red Bananas and Red Currents. The selection during the winter is limiting, but even with out of season berries the cobbler tastes quite good since all the juices from the fruit mixes into a light all natural sugar syrup and the fruits become flavored by the warmed mixture of that. There is no need to add extra sugar to the fruit since fruit is so naturally sweet to begin with.


Ingredients:
2 cups of flour
2/3 cup of sugar
1/2 a cup to 3/4 cup of butter
3 to 4 cups of mixed berries
1/8 cup of water

Before you start to cook take the butter out of the refrigerator so it becomes a bit soft.

When the butter is ready sift the flour into a mixing bowl and slowly add the sugar. Once the flour and the sugar is mixed together well place the first 1/2 cup of butter, sliced into the bowl. With your hands begin to break up the butter and get the ingredients to become one cohesive crumbly mixture. You may or may not need to add the remaining 1/4 cup of butter.

Take the mixed berries, cut any strawberries in halves and then using a medium sized glass dish pour the mixed berries on the bottom and the water, spread evenly. Next take the crumb mixture and sprinkle evenly on the top.

Cook the cobbler for 20-30 minutes or until the crumbs have begun to brown slightly. It can be eaten warm or cold and the end result is all about the texture of the fruit with the sweet crust.

2.11.2011

Spanakopita


Spanakopita (spinach and feta pie)

This dish is really delicious, and great for dinners at home as well as parties. It can be served as an appetizer or as part of a complete meal with a salad and other small dishes on the side.


Ingredients:

1 lb spinach
5-6 finely chopped scallions
1/2 cup finely chopped parsley
1 lb feta cheese, crumbled
1/4 cup milk
4 eggs, beaten
salt and pepper
1/4 cup melted butter + 1/4 cup olive oil
2/3 lb ready-made filo pastry


Instructions:

Preheat the oven to 350 degrees F.

Blanch the spinach in boiling water for one minute, then drain and squeeze out as much water as possible.

Chop the spinach, and mix with the scallions, parsley, cheese, milk, eggs, salt and pepper.

Melt oil and butter together, and brush a thin coating of it onto a 14-inch baking pan with a pastry brush. Layer half of the filo sheets into the pan, brushing the oil & butter combo between each layer.

Spread the spinach filling evenly on top, then cover with the remaining filo sheets, again brushing each sheet with oil & butter.

Score into 12 serving pieces, sprinkle with a little water, and bake for 1 hour or until golden brown. Serve warm or at room temperature.

2.10.2011

Places to Eat on the Lower East Side, New York City


 I've been so busy with school work that I haven't been able to cook so I figured instead I should post a bit about my favorite restaurants and coffee shops on the Lower East Side (Where I currently am dorming in NYC for school). For those of you who don't live in New York City.... these are the places that you should be visiting when you come down to the touristy Lower East Side. Good luck!


An Choi: 85 Orchard Street, NYC 10002
This Vietnamese restaurant has really great food. Their sandwiches and their noodles are really tasty and much lighter/less greasy than most other Asian style restaurants. The only problem with them is that they don't handle having a busy restaurant well.

88 Orchard: 88 Orchard Street, NYC 10002
By day it's a hip coffee shop with great pastries and sandwiches and by night it becomes a casual, but really nice dinner spot. The food it simple, but really good and their lattes have a lot of flavor.

Essex Street Market: 120 Essex Street, NYC 10002
Okay, so sure I don't exactly eat here, but it's where I do most of my food shopping. It's an indoor market with individual shops for different trades. The bread shop is some of the best bread I've eaten, there is a really great cheese shop, a meat shop, fish stand, chocolate shop, and lots of other shops for fruits, vegetables, and other staples.

Creperie: 135 Ludlow Street, NYC 10002
This Creperie is really good, they have lots and lots crepe options... I usually just get butter and sugar (the classic crepe)... They are open really really late most days are a bit expensive, and most importantly I think I'd eat here most often if I thought I wouldn't gain five hundred pounds for eating there every day.


Mikey's Burger: 134 Ludlow Street, NYC 10002
This place quite possibly has the best burgers downtown. They cook them all in front of you and their meat appears to be hand made since they are all rolled into balls and flattened when they begin to cook it for you. They have a lot of hamburger/vegetarian burgers options and the cute seats around the grill is perfect for the more eclectic lower east side feel.


Bruschetteria: 92 Rivington Street, NYC 10002
This place has a great atmosphere, it's all about drinking good wine with a nice meal. The only problem is that their coffee isn't so great, and that the food is hit or miss. Some of their dishes are absolutely fantastic and then others are horrible... there seems to be no in between. All of their bruschetta is really good, but then all of their pastas are horrible.... I think they may use ragu sauce or something... It's a risk to eat here, but if you pick your food well it's actually a really great restaurant.

Other really great places:
D'espresso: 100 Stanton Street, NYC 10002
Laboratorio Del Gelato: 188 Ludlow Street, NYC 10002
Congee Village: 100 Allen Street, NYC 10002
Teany: 90 Rivington Street, NYC 10002
Himalayan Cafe Inc: 78 East 1st Street, 10009
Bluebird Coffeshop: 72 East 1st street, 10003

2.09.2011

My Cuppa Tea

Tonight after dinner I developed a sweet tooth (as I usually do). Chocolate didn't seem like the answer and ice cream seemed too sweet. Then I spotted the kiwi in my fruit basket. Juicy, light, slightly sweet and mildly tart...crunchy little seeds...that's the ticket! And it was...now for my evening tea with a cinnamon stick and the juice of a Myer lemon picked from my friend's backyard. Yesssssssss....

Pigment Power

As an add on to my earlier post about vegetable soup...

My work with oncology patients has steered me to take a vested interest in cancer prevention and prevention of cancer recurrence. Lately my interest has been piqued by phytochemicals, which literally means "plant chemicals." Hundreds have been found in plant foods, and have revealed nothing short of miraculous benefits in terms of disease prevention and health promotion.

When choosing my soup ingredients, I try to choose the most vibrant veggies I can find since the greatest number of health compounds are found in the most colorful foods.

Tonight, I decided to use the small cabbages we know as Brussels sprouts. These "cruciferous" vegetables contain sulphoraphane dithiolthiones, indoles, and isothiocyanates (among other health properties) all of which play very specific roles in cancer prevention. So amazing!

The soup was delicious too :)

2.08.2011

Pasta with Vodka Sauce

I wish I could make this recipe here at school, but since we're not allowed to have alcohol in the dorms I think it would be a problem if I took out the very necessary handle of vodka in the community kitchen... until I have my own kitchen I have to settle for jarred vodka sauce.... Even though I can't enjoy it I figured I should still share it with you so here it goes......

I got the structure of this recipe from a friend’s mom and since then I have altered it just a little bit from her original, but needless to say I think it’s a great recipe. It makes enough for about eight people.

2 lbs pasta (penne or rigatoni)
1 ½ sticks of butter unsalted
½ cup of vodka
2 cups of light cream
3 cups of marinara sauce
Small Can of Tomato Paste
3/4 cup ofgrated Locatelli/Ramano/Pecorino cheese
Some black pepper (to taste)

Optional: 1/4lbsProsciutto Chopped, Parsley (to taste), ½ cup of Peas, Shrimp or Chicken

Set a big pot of water aside so it will begin to boil.

If using prosciutto sauté it and the tomato paste in a large skillet with some of the butter once sautéed add the remaining butter until melted. If not using prosciutto simply melt the butter and tomato paste in the large skillet.

Then add the vodka to the butter and let it simmer for at least ten minutes so the alcohol will burn off. You’ll know if it is ready because the air above the skillet won’t smell of vodka anymore. (To burn off the alcohol faster carefully using a match to light the alcohol on fire. The fire will burn off fast and on its own).

Put the pasta into the boiling water and then add the other ingredients to the vodka/butter mixture. Let cook for at least 10 minutes or until the pasta is ready.

2.07.2011

Soup for One

With Bill in Texas, I've had to adjust to cooking for one. Recently, I've gotten into the routine of making a big pot of soup to get me through the week's dinners.

I start by putting 8 ounces of dry beans in my crockpot. High-heat for one hour, then let them cook for about 3 hours on low heat (or until tender...I try to avoid mushy beans).

The base for my soup du jour, is always mirepoix (a simple combination of onions, carrots, and celery) sauteed in a generous dash of good quality Italian olive oil. Next, I prepare about 4 cups of vegetarian broth using good quality bullion. Next, add minced garlic and salt & pepper to taste plus whatever vegetables look good at the market...usually a sweet potato or 1/4 of a butternut squash, a parsnip, some Brussels sprouts, an occasional turnip or two. Peel and cube the vegetables and gently toss them with the mirepoix to mix the flavors. Add some herbs like oregano, basil, marjoram, thyme, and/or sage. Now add the broth and bring to a boil; cover, and simmer on low for 15 minutes.

Throw in your crock pot beans (or canned beans) and add a red, yellow, or orange bell pepper and a chopped tomato if desired; I like to throw in some chopped Swiss chard or kale too. To round out the flavor, add an acid. Depending on what flavor you are going for, you can squeeze a lime or lemon, or a few dashes of quality aged balsamic vinegar. If using citrus, I would also add about 1-2 tsp quality soy sauce, like tamari. Increase the heat to medium for about 5 minutes and serve. I like to add plain Greek-style yogurt and some sunflower seeds to garnish some of my soups. Enjoy!

This is a soup I made recently with Heirloom Christmas lima beans. Yum! Continued Post.

My Favorite Knife

There are certain kitchen tools that are so great that they truly add profound enjoyment to food preparation. Arguably the very most important tool to have in your kitchen is at least one good quality, really sharp knife. Not only is such a knife more efficient to use than a dull one, it is also much safer to use because the ease of cutting your food with it makes it less likely that you will struggle or put unneeded pressure downward upon it, and hence much less likely to become injured yourself!

One summer I was blessed with the opportunity to spend a number of weeks in the southwest of France with my family. However, the batterie de cuisine in our humble apartment did not include even one acceptable chopping apparatus and this was, well, very unacceptable to me! On a beautiful outing to the Mediterranean beach town of Collioure one day, I stopped in at a general store and picked up this fine chef's knife. Nearly four years later it is still the first one I reach for each time I need to chop an onion.

Not only is it very sharp, and just the right length with a very comfortable handle, but each time I use it, it conjures up this image in my mind:


Now how can you beat that?!

Two important lessons to take away from this anecdote:
1) Make sure that you are cooking with tools that get the job done well.
2) Surround yourself with things that give you pleasure, even in the most mundane of tasks!

In conclusion, I leave you with some advice from Pablo Picasso, who was inspired in his art by the beauty of Collioure, the same town that inspires me in memory just about every day in my kitchen!

"Never permit a dichotomy to rule your life, a dichotomy in which you hate what you do so you can have pleasure in your spare time. Look for a situation in which your work will give you as much happiness as your spare time."

Chicken Parmesan

This is another family recipe. I figured out to make it based on watching other family members cook it so sorry that there aren’t any quantities listed. It was particularly challenging to cook this in the community kitchen dorm tonight. The community kitchen sink was clogged and it looked as if the kitchen hadn’t been cleaned in about two months. It’d be nice to have my own kitchen, but needless to say my friends and I managed to cook the Chicken Parmesan without having any of our food touch any of the community kitchen surfaces (ie: the table, the stove, the sink, etc.).

Ingredients:
Before it was placed in the oven.
Chicken breast
Breadcrumbs (Progresso Italian style)
Eggs
Flour
Olive oil
Parmesan Cheese Grated
Fresh Mozzarella Cheese Sliced

Preheat the oven to 350 degrees Fahrenheit. Prepare the chicken breasts by trimming away the fat and cutting them into smaller chicken breast pieces. Set aside and set up three bowls; one filled with some flour, one filled with whisked eggs, and one filled with some breadcrumbs. Also, set aside a skillet with a good amount of olive oil on the stove and a pan to be placed in the oven.

Then cover each chicken breast completely in the bowl of flour then cover them completely with egg in the egg bowl and then cover them completely with bread crumbs in the bread crumb bowl. When the olive oil in the skillet is hot begin to brown the chicken on both sides in the pan adding more olive oil as needed. When the chicken is browned place it in the oven pan you set aside earlier.

Cover each chicken with some marinara sauce. Then sprinkle some Parmesan cheese over the sauce and place slices of mozzarella cheese on each breast of chicken too. Once everything has been covered place it into the oven for about 25 minutes or until the chicken is cooked all the way through. 

Serve the chicken with pasta with marinara sauce. I also chose to serve it with some salad.... We ate on my dorm room floor... maybe next year I'll have a table.

2.06.2011

Marinara Sauce

This is a family recipe, I used to watch my mother make it and she would watch her mother make it. For the most part we actually add many of the ingredients to taste and not with actual amounts. I approximated the quantities to make it easier to follow. With these quantities it makes enough sauce for about eight people.

2lbs pasta (penne or rigatoni)
1 white onion chopped
2 cans of chopped tomatoes (preferably Luigi Vitelli or Progresso brand) (each 28oz)
2 garlic cloves diced
Basil Leaves (Dried)
2 Whole Bay Leaves (Dried)
Olive Oil
Salt and Pepper (to taste)

Optional: 2 Carrots chopped

In a skillet sauté the onion, salt, garlic, and a good amount of olive oil. Cook until the onions are translucent (just before they begin to brown). Meanwhile put the cans of chopped tomatoes into a big pot with the basil leaves, bay leaves, carrots, and pepper. Make sure to put a generous amount of basil leaves and pour some olive oil directly into the sauce.

Once the tomato mixture is warm add the sautéed things and cook stirring occasionally for about 30 minutes.

Sorry for the lack of pictures…. My camera’s battery wasn’t charged when I made this yesterday, opps. I’ll post pictures next time I make it. 

Tortellini

Inspired by Chinese New Year this week, I read a description of my Chinese Zodiac sign, the horse. The description claimed that those born under the sign of the horse are "good with their hands." My first reaction was one of disbelief, as I don't see myself as one who is terribly crafty or visually artistic, and am not usually enamored with creations born of my own hands. But then I got to thinking, well I *did* make these pretty little tortellini recently!


I was feeling slightly more inspired than usual on that day, and following the instructions in Giuliano Bugialli's book On Pasta, I think I succeeded in making some pretty photo-worthy little packages!

I do confess that these were actually not so hard once I got the hang of it. These little beauties can be filled with any pasta filling you desire. In my case I used a ricotta and freshly chopped herb filling.

Here's how you do it:

First you will need to make sure you have a round cutter for the task so that you can make your pasta into perfect, uniformly sized circles. I use these, very useful for all kinds of kitchen prep, even things so mundanely clever as making donut-shaped peanut butter and jelly sandwiches for the kids ;)

For this recipe I chose a cutter 7 centimeters in diameter (that's about 2.75 inches).

Prepare your filling, then mix up a batch of pasta dough. I use 3 eggs per 2 cups of all-purpose flour for 1 lb of pasta. Roll the pasta out to the thinnest setting using your pasta machine.

Cut out as many 7 cm. circles as you can, then place a small dollop of filling in the center of each circle. Moisten the edges using beaten egg whites, then fold the circle *almost* in half, allowing just a small border on one side that sticks out a little past the rest. Then, wrap this half-circle around your finger and press the corners together with your thumb until they stick. Remove the little tortellino, give him a flip so that the top edge curls outward, and presto!

Good luck! It takes just a little practice, but once you get the hang of it you'll see, it's not so hard and really kind of fun!

2.05.2011

Madeleines

Ever since my family and I went and ate at the restaurant, Daniel, in NYC we have all fallen in love with Madeleines. I’m in college and my French roommate and I decided that we had to make them to celebrate her twentieth birthday. We decided to use a recipe her and her sister used when they made them as kids.

Sorry for the approximations of a few of the ingredients they had to be converted from the original French recipe.

.5 Cup and Little Bit, Melted Butter
3 Eggs
2/3 Cup Sugar
1 Heaping Cup Flour
2 Tsp Baking Powder
1 Lemon

Optional:
1 Tbsp Honey
1 Lemon
2 Cups Nutella or Jelly

Preheat the oven to 400 degrees Fahrenheit. In a pot cook butter until fully melted. Meanwhile, in a mixing bowl whisk together the eggs, sugar, and honey (if using honey) until frothy and creamy. We did not add the honey because of the fact that we were cooking this in a dorm room. Zest the lemon and set aside (if using lemon).

Add half of the flour and baking powder to the egg sugar mixture until smooth. Then slowly add the butter, the remaining flour, and the lemon zest (if using lemon).

Be sure to put the Nutella or Jelly
inside of them and if you can't then cover
it up with some extra batter.
Take the Madeleine pan (Amazingly we have one in our dorm room, but if you don’t have one… try using a cup cake tin, just don’t fill the tin up all the way. I’ve never tried this, but it’s worth a shot) and grease it to make sure that the Madeleine’s don’t stick. We buttered the pan and then sprinkled it with flour. Once the pan is greased fill with some of the dough. They will rise a little bit so don’t overfill them. If you are going to use Nutella/Jelly use a pipette or fill a small plastic bag with some of the Nutella/Jelly and squeeze it into the center of each Madeleine.

Put them in the preheated oven for eight minutes until they are slightly browned on the edges but still golden in the center. Let them cool and eat them warm or cold… they are amazing either way.