7.30.2011

Summer Salad with Heirloom Tomatoes and Arugula

Something about having an entire heirloom tomato to one's self feels incredibly indulgent, and wonderful!

Heirloom tomatoes, by definition, are open-pollinated cultivars (a plant selected for desirable characteristics that can be maintained by propagation - unlike varieties of GMO produce that have been bred to lack seeds). A true heirloom is a cultivar that has been nurtured, selected, and handed down by family members for many generations.

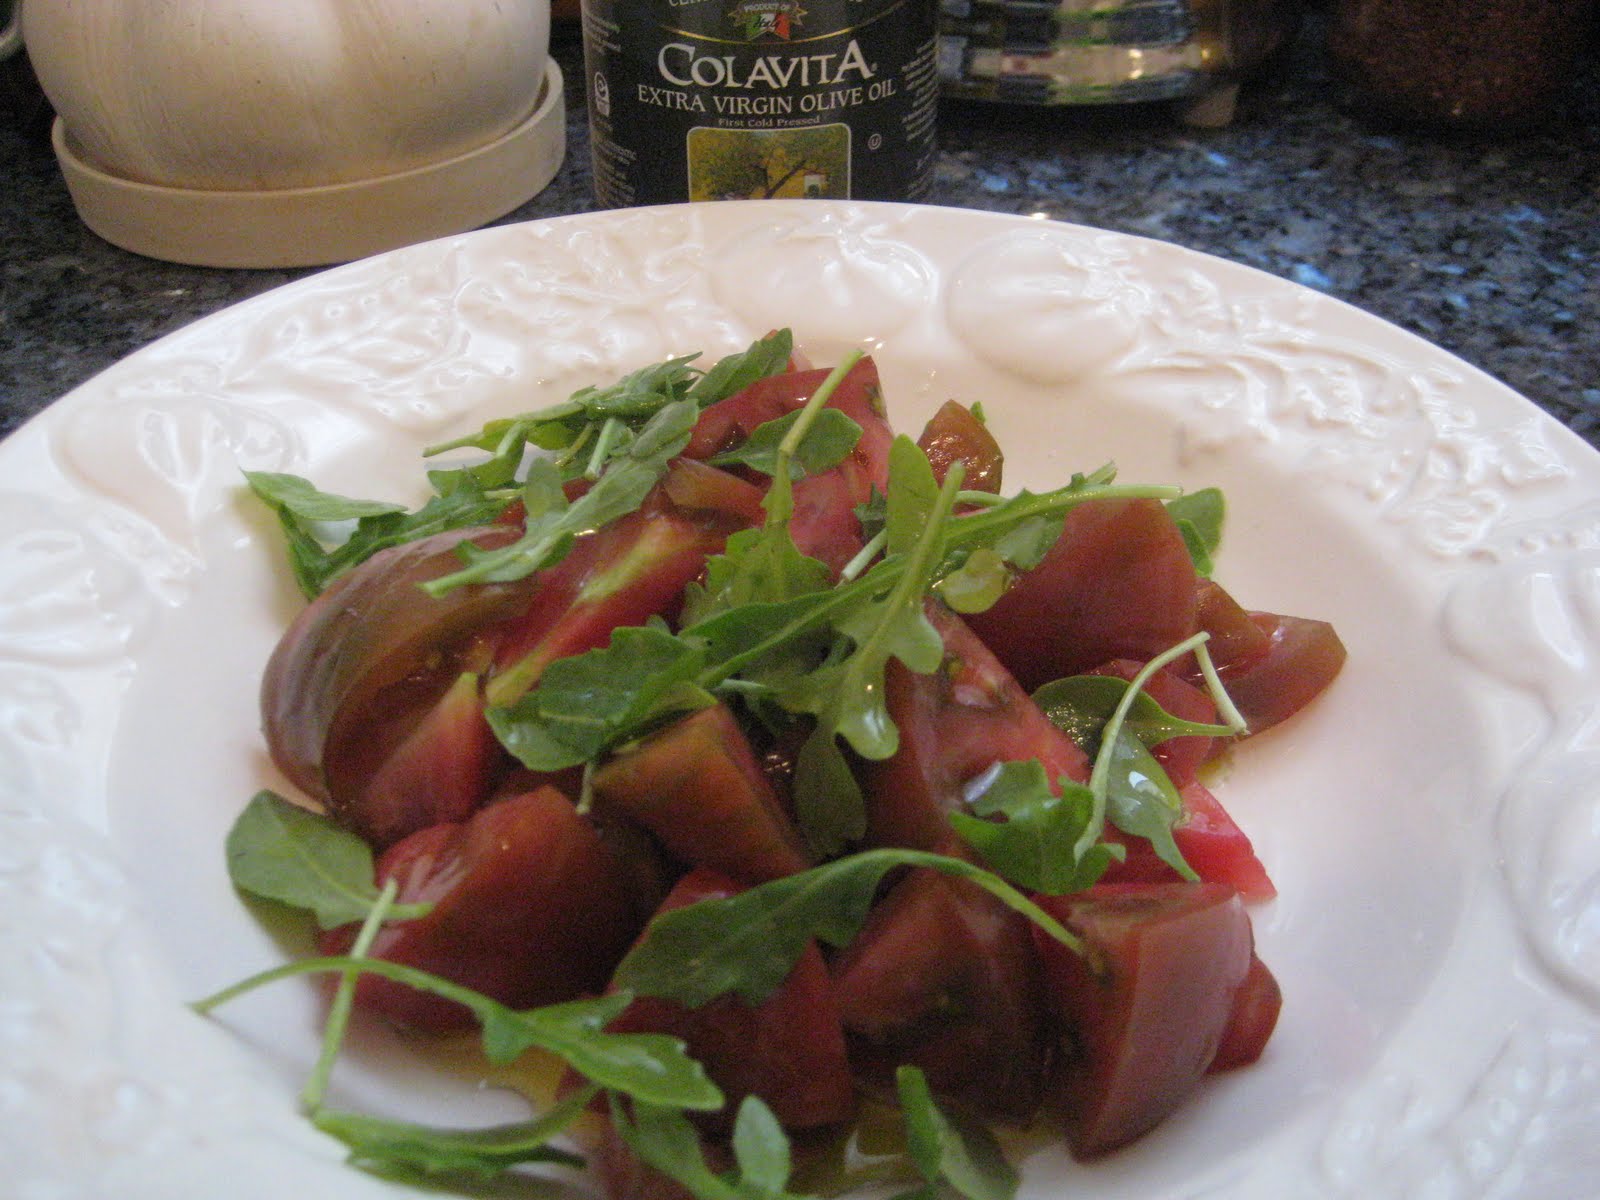
Typically, I've been enjoying salads with baby arugula as the base, but on this occasion, shortly after returning from my local Farmer's market, I decided to have some fun with this "Cherokee purple" tomato:

First, I sliced it into big, beautiful wedges.

Then, just a sprinkle of organic baby arugula to add texture and a mild peppery flavor, plus a generous drizzle of olive oil.

Next, lemon zest to give it some extra zip!

And, finally, some fresh walnut halves to add texture, crunch and heart-healthy fat; and some freshly ground salt & pepper to taste.

Oh, my, goodness. Num num num num num.

6.26.2011

Fettucini with Asparagus and Fresh Goat Cheese


To make the fresh egg pasta all you need is 2 cups of all-purpose flour and 3 large eggs, beaten. Pulse the flour with a metal blade in a food processor to distribute and aerate; then add the eggs and process until the dough forms into a ball, about 30 seconds. Turn the dough ball out onto a dry work surface and knead until smooth (1-2 minutes). Cover with plastic wrap and let rest for at least 15 minutes up to 2 hours. Then use a pasta machine to roll out the dough and cut (per your pasta machine instructions).

Voila!
To prepare for the sauce, steam 1 pound of 1-inch asparagus pieces until just tender (about 2 min). Set aside. Then place 3 ounces of fresh goat cheese (crumbled), 1/4 cup heavy cream, and 1 clove of minced garlic into a small bowl and combine. Chop about 2 Tbsp of fresh mint leaves. Meanwhile, bring about 4 quarts of water to a boil with a Tbsp of salt and cook your pasta until al dente. Reserve 1/2 cup of the cooking water; drain the pasta and transfer it back to the pot. Stir in the asparagus, goat cheese mixture, and mint; and use the reserved cooking water to moisten as necessary. Season with salt and pepper to taste and serve immediately. Enjoy!

5.29.2011

Eggs Benedict

The title of this post should really be "How to Make a Hollandaise Sauce Without Mucking It Up".

A month or two ago I decided to whip up some Eggs Benedict for my family for Saturday brunch. It had been awhile since I'd made the dish, and my husband came into the kitchen as I was starting. He asked me, "When's the last time your Hollandaise failed?" I paused and thought about it... "You know, I really don't know, it's been such a long time." Little by little the rest of the family came in, made some number of distractions, and lo and behold, the sauce broke for the first time in as long as I could remember! I was so sad! We ate it anyway, and my younger daughter told me, "This is the best lunch you've ever made!" I felt happier for a minute, until she added, "That's because you never make lunch." OK, admittedly I'm pretty lazy on the weekends when it comes to our midday meal and they eat their weekday lunches at school, so I concede... *sigh* My Hollandaise failure pretty much made me a cranky grump for the rest of the day. I've begun to take myself too seriously!

There are a couple of major ways one can fail at making a Hollandaise sauce. The one that led to my sauce's demise is temperature. It is extremely important that your sauce is not allowed to overheat, EVER! This is important while making the sabayon of egg yolk and water, but much more important while making your emulsion. This is crucial: before adding the butter to the sauce, REMOVE IT FROM THE HEAT!

The second important thing to keep in mind is that the melted butter needs to be added in a small, steady stream, and you cannot stop whisking! Keep that whisk moving, and don't add too much butter at once.

So here we go...

First step:

Clarify enough butter to make 200mL, somewhere between 1.5-2 sticks. Do this by melting it over medium heat in a small saucepan until it bubbles and the solids begin to coagulate on the sides. Strain through a fine mesh strainer into a glass measuring cup. Set aside until needed, keeping warm but not hot.

In a double boiler (water in the bottom pan) over medium heat, whisk together 2 egg yolks with 1 fluid ounce of water (= 30 mL for Europeans, 1 shot glass for the rest of us.) Whisk constantly until the heat begins to cook the mixture ever so slightly. It should look like thick, frothy pudding, not like scrambled eggs. This is called a sabayon.


Make your emulsification by whisking the 200 mL of melted clarified butter into your sabayon (OFF the stovetop, please!), pouring the butter in a very small, steady stream. Whisk constantly, making sure that the butter is incorporating well into the sabayon to make a smooth, homogenous mixture.


Season your sauce with a pinch of cayenne pepper and about 2 teaspoons of lemon juice, or to taste.

Serve over poached eggs, Canadian bacon, and an English muffin to make a standard Eggs Benedict, or do what I do and serve it atop eggs gently cooked over easy, Canadian bacon, and some toasted rustic sliced bread.


Here's to never breaking your sauce!

4.01.2011

Apple Butterscotch Oatmeal Cookies

Today I thought that I invented a recipe, which I called Apple Butterscotch Oatmeal Cookies. Apparently this is not a new concept. A Google search yields plenty of recipes. At any rate, they are tasty and chewy and a nice change of pace.


Here is how I did it:

Cream together:
2 sticks butter at room temperature
1/2 cup brown sugar
2 eggs
1 tsp vanilla

Beat in:
1 1/4 cup flour
1 tsp baking soda
1/2 tsp salt
1/2 tsp cinnamon

Stir in:
6 packets apple cinnamon flavor instant oatmeal (approx. 3 cups)
1 package (11 oz) butterscotch chips


Drop by the spoonful onto baking sheets, and bake at 375 degrees F for 8-10 minutes; yields 3-4 dozen.

ENJOY!

3.01.2011

Tomato Goat Cheese Tart


  • Preheat oven to 400 degrees Fahrenheit
  • Line a tart pan with pre-made filo, brush with melted butter
  • Thinly slice about 4 plum tomatoes, and top the filo crust concentrically with the slices
  • Beat together 3/4 cup cream, 3/4 cup milk, 3 eggs, 4 ounces goat cheese, salt, pepper, nutmeg and chopped parsley
  • Pour the mixture over the tomatoes
  • Bake the tart for about 45 minutes

ENJOY!

2.15.2011

Veal with Fontina Cream Sauce

For our Valentine's Day dinner last night, I decided to keep things simple but flavorful. I was pressed for time because of many late afternoon errands, but knew I wanted to do something special. I browsed through a cookbook I own and have not yet cooked from, but which looks really good: Il Viaggio di Vetri. With limited time on my hands I was too overwhelmed to follow a new recipe step by step, since it is less time-consuming for me to just throw something together. I found a really yummy-sounding recipe, took the basic idea of the ingredients list, and put my own personal twist on it. This is what I came up with:


And here is what I did to make it...

First disclaimer, I measured nothing...

First, put a handful of dried porcini mushrooms to soak in hot water.

Next, pour some cream into a saucepan over low heat, add some thin slices of fontina cheese, and add some fresh rosemary. I cleared an entire sprig. Season with ground sea salt freshly ground white pepper. Let the sauce simmer at a very low heat all the while that you are preparing the rest of the ingredients so that the rosemary flavor will become deeply infused.

After at least 20 minutes of soaking, finely chop the porcini mushrooms, then saute them in butter. Season with salt and freshly ground black pepper.

Next, coat thick cubes of veal cutlet in flour seasoned with salt and pepper. Heat some vegetable oil over medium heat in a skillet, and cook the veal for about 5 minutes on each side more or less depending on thickness.

Meanwhile wash and trim some broccolini, and barely saute it in some olive oil. Season with salt and pepper.

Spoon a layer of sauce onto each serving plate. Top with a serving of veal. Sprinkle with porcini mushrooms, then drizzle some more sauce over the top. Garnish with freshly chopped Italian parsley. Add some broccolini on the side.

Enjoy!

2.13.2011

Chocolate Chip Cookies (Vegan, but DON'T let that deter you!)

I was first introduced to this dessert last summer during a wine country picnic. One of my girlfriends at work follows a vegan diet, and she brought these cookies to share with the group. I have had my share of bad vegan cookies, so was pleasantly surprise and amazed when I experienced the well-rounded flavor and the terrific texture. I actually think they are better than most traditional chocolate chip cookie recipes.

Since tomorrow is Valentine's day, and Bill is STILL in Texas, I decided to make these cookies for myself. I MAY share and take them to work.

I would recommend doubling or tripling the recipe, yields about 3 dozen cookies. Note that the cookies spread a lot and come out big and fluffy.


Ingredients:
1 cup unbleached all-purpose flour
1 teaspoon baking powder
1⁄2 teaspoon baking soda
1⁄4 cup unrefined sugar
1⁄4 teaspoon sea salt
1⁄3 cup pure maple syrup
1⁄4 teaspoon blackstrap molasses
1 – 1 1⁄2 teaspoons pure vanilla extract
1⁄4 cup canola oil (a little generous)
1⁄3 cup non-dairy chocolate chips


Preheat oven to 350°F (176°C). In a bowl, sift in the flour, baking powder, and baking soda. Add the sugar and salt, and stir until well combined. In a separate bowl, combine the maple syrup with the molasses and vanilla, then stir in the oil until well combined. Add the wet mixture to the dry, along with the chocolate chips, and stir through until just well combined (do not over-mix). Place large spoonfuls of the batter on a baking sheet lined with parchment paper and flatten a little. Bake for 11 minutes, until just golden (if you bake for much longer, they will dry out). Let cool on the sheet for no more than 1 minute (again, to prevent drying), then transfer to a cooling rack.
I just ate a warm one straight out of the oven with a tall glass of cold soy milk :) I hope you enjoy this interesting and yummy recipe as much as I do!